
First steps
When you first start the application, you will be greeted with a simple wizard allowing you to select the basic settings that will tailor the app to your preference. Any settings you define in this wizard can be changed later so don't worry about making a wrong selection. For more info on that, please see the wizard documentation in the settings section.
The main app form is displayed here and is designed to give you easy access to the common functions you may need. On the left side you have the selection of available screens: main, settings, manual graph edit, manual, store, change log and about. If you have a large screen, the selection may be expanded to show you text as well. Beside the selection you're looking at the main app form.
There's a quick display of current sensor readings, a brightness graph, a couple of quick switches and the preset buttons.
To enable Velis Auto Brightness, check the "Automatic brightness" switch or checkbox - depends on your Android version, but functionality is the same in both cases. Also make sure you disable any previous auto brightness apps you may have installed. Enabling automatic brightness will do two things: it will disable system auto brightness routine and start tracking your light sensor while adjusting brightness according to the default brightness curve you see in the graph.
Your next step then is to load presets and see which one may suit your needs best. You will find the presets in the settings screen, which is accessible by pressing the gears icon in the screen selection list. You will find presets towards the end of settings menu.
Menu / screen selector
This is the list you see on left side of the screen. It displays possible screens you can display to work with the application. Additionally, by swiping left or right you can expand or contract the list itself if you need more verbosity or would like to tuck it away.A right swype will expand the list to full size.
One left swype will shrink it to icons display.
Another left swype will hide the list.
Manual graph adjustment / fine tuning
If no preset suits you, you will notice that the graph has two red lines marking current brightness state. Each of these has a slightly bolded handle at its end. You can touch and move these handles to adjust the brightness curve any way you like. When you do so, you will also notice two buttons appearing below the graph. You can either apply or cancel your changes with these buttons. Also, if you accidentally touch a handle and start the adjustment, the app will automatically cancel your change after an adjustable period of time.Presets
Initially there won't be any presets stored in your device. Using the preset buttons gives you the option of saving your custom-made brightness graphs under your own names - just make sure to keep them short :-)Long-pressing any preset button will present a popup menu allowing you to save or delete a preset.
Short-pressing a saved preset button will load the brightness curve for that preset.
Settings explanations

Run settings wizard
The settings wizard will first reset all your settings to default. Then you will follow six simple screens to set the most important aspects of app operation.The wizard offers choice for the foolowing settings:
- Brightness preset: select a rough brightness according to your preference. The selected preset will represent a starting point for your personalised brightness curve and is a very important selection: you want your screen to be appropriately lit so that you can see what is displayed on it, but not lit too much because that would consume too much battery.
- Sensor sensitivity (afects multiple settings): with this setting you tell the app how responsive it should be to environment light changes. You must carefully balance fast response which may introduce some flicker and slow response that tries provide you with a stably lit screen as much as possible.
- Charging brightness: allows your screen to be brighter when the device is charging
- App activation: the last wizard setting alows you to enable the app. The app needs to be enabled to do its magic.
- The last wizard screen makes a brief introduction to the graph on main app screen.

Application language
Allows you to select any of the app-supported languages even if your phone's settings are to a different language. Helpful if you want this app in a language that otherwise isn't well supported on your phone.Excluded apps
Use this setting to select apps that will disable Velis Auto Brightness when on top. Android APK installer is one of such apps which fails to work properly if there's a screen filter active on your phone. Disabling auto brightness when such apps are running ensures their proper operation.Please note that retrieving installed apps list is a fairly time consuming process. The list will update in the background even as it is displayed on screen. You can however work with it even as such updates are performed.
Service activation section
In this section you will find the settings that manage Velis auto brightness operation (whether the app works or not).Automatic brightness
This setting enables or disables the app's automatic brightness handling. Setting it to on will naturally enable the app. This setting is also set by the "automatic brightness" switch in apps main window.Disable system handler
This setting disables the Android OS system auto brightness handler. Setting it to on will disable the OS handler. When using Velis auto brightness it is recommended this setting to be on, otherwise system will interfere with Velis app operation.Optional update system brightness setting
Turning this setting on will update system brightness setting in the settings app. This normally has no functional benefits, but you may enjoy yourself watching the brightness slider move as the light changes :-) This option may have a minor additional impact on battery usage when enabled.However, this setting may actually become necessary if you're on android 4.3+ and you don't want notification. Since Android OS may kill the app at times, turning this setting on at least makes sure that screen brightness doesn't change during the time it takes for the app to restart itself.
Interactive notification
 Interactive notification has several functions that allow you to quickly work with Velis Auto Brightness settings.
- There's a button for turning service on and off
- Pressing on the progress bar will set brightness appropriate to the spot where you pressed
- The Confirm and Cancel buttons will Confirm or Cancel any manual brightness setting into the current brightness graph. They are only visible once an adjustment in brightness had been made.
- Pressing anywhere else on the notification (the icon) will open main app screen
This functionality does not work on android 2.x since it doesn't support custom areas for press detection. Without this functionality the notification wouldn't be very interactive :) Users of Android 2.x only have the hidden notification which is necessary for the service to stay alive at all times.
Only users of android versions 3.0 and higher will see this option in settings and will be able to choose between hidden notification or interactive one.
Since version 3.55.151 users of android 4.3 and higher can opt out of notification with a workaround that will hopefully keep the service running even though Android would have killed it. See FAQ about how to activate this.

Sensors section
This section contains a list of all supported sensors and allows you to choose which sensors will be used for app operation.Brightness sensor
This setting tells the app whether to use the brightness sensor or not. This sensor is pretty much essential for app operation so at the moment it is not sensible to turn it off - you would lose the auto brightness operation altogether since this sensor is the only source of brightness information for the app right now.Later, maybe, when cameras are also supported, the app will have enough info from cameras and this sensor will be safe to turn off.
Screen touch
This setting detects when you are touching the screen and disables screen brightness updating during such times. This results in screen keeping its brightness constant while you are using the device thus minimising the distractions that would otherwise result from changing screen brightness.Typically you would set this to a large value, say, 30 seconds and this setting will make sure your screen stays rock solid while you are reading a web page or e-mail.
Triple tapping the screen inside 2 seconds will immediately update screen brightness to current sensor reading.
Proximity sensor
This sensor detects whether there is something over your device (e.g. your hand). When this is detected, the app will not adjust brightness according to brightness sensor since the readings are invalid due to additional shade created by your hand.Since proximity sensors have quite limited range, the app cancels brightness adjustments from 3 seconds before the proximity sensor triggers to 3 seconds after proximity sensor releases.
Front / back camera
Enables the respective camera, if available on your device. Cameras should only be used if your light sensor is not functioning properly. They are a lot less precise and consume a lot more battery.If brightness sensor is active, results from camera readings will be ignored, otherwise results from the camera reporting higher environment brightness will be used.
Camera read interval
Consider this interval well because cameras require a lot of power to operate. Additionally, taking a picture from camera is time consuming, so the shortest interval - 1 second - might not even be achievable on your device.In any case using cameras will not be very responsive in comparison to a dedicated light sensor.
Screen-on sensor override
When you frequently move among bright and dim environments, your device will always try to adapt to light conditions in the current environment. This is all fine and dandy if you change the environment with screen turned on so that light changes are tracked in real time. When you turn screen off however, your device will stop tracking sensor changes to conserve battery.So when you turn screen on, the previous brightness value will still be in effect. If you came from a bright environment, your screen will be bright until it adapts to the new light conditions. If you came from a dark environment, the situation will be reversed.
You can counter this with two settings: this one and Smoothing override, which is explained a bit later in this manual.
Screen on override tries to counter the undesired brightness settings by forcing display brightness to match the entered lux reading when you turn display on. So if you like to go from dark to lighter display, you would enter a dark lux reading here, below 100. If on the other hand you like your screen to be bright initially, you would enter an outdors reading, something above 1000. Or you can go down the middle with a setting between 100 and 1000 and expect your display brightness to only correct a bit when you turn the screen on.
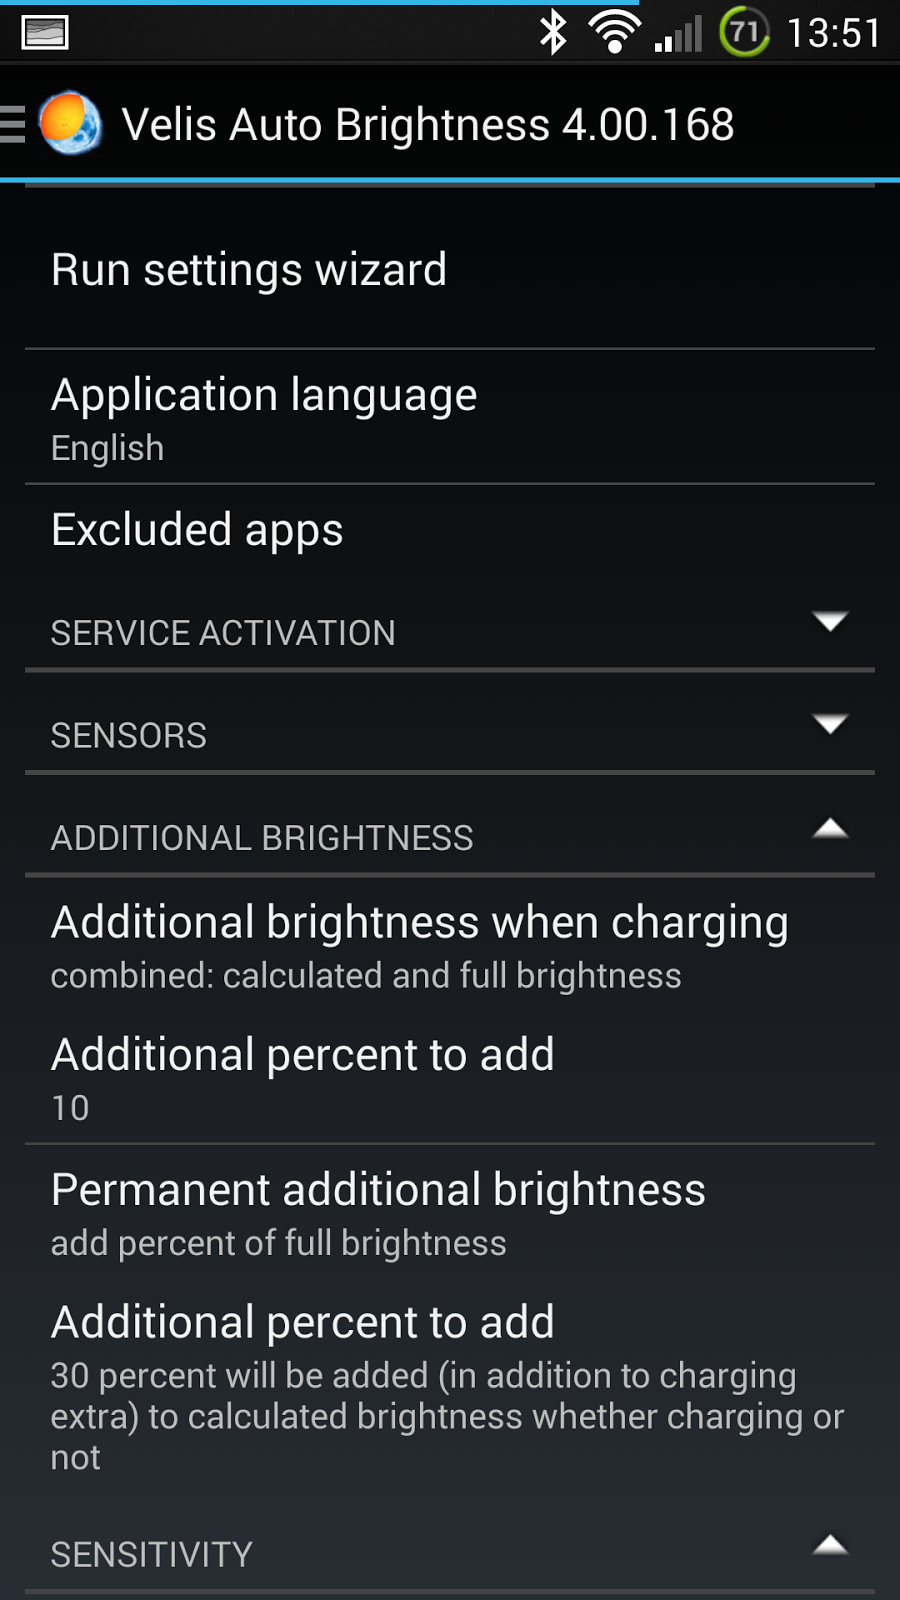 Additional brightness
Settings in this section allow setting two modes for additional brightness:- Additional brightness when charging
- Permanent additional brightness
Additional brightness
Set how the additional brightness is applied:- no extra brightness: what is says on the tin - there will be no brightness change when charging
- add percent of calculated brightness: if app calculates the brightness to be set to a certain percent (x), the calculated x will be increased by the set percentage (x = x + x * percentage)
- add percent of full brightness: this will add a constant percent of total brightness (x = x + percentage total)
- combined: calculated and full brightness: this method just adds method 2 and 3 to achieve a combined effect
Additional percent to add
This is the percentage to use in the above methods. Setting this to 10% will result in the following calculations for the above methods:- x = x
- x = x + x * 0.1
- x = x + 100 * 0.1
- x = x + 100 * 0.1 + x * 0.1
 Sensitivity section
The sensitivity section regulates app's sensitivity to sensor readings changes. The higher the sensitivity, the more responsive the app, but that may also lead to some unwanted brightness changes. Find the perfect balance between responsiveness and number of changes for your taste.This section is also for handling flickering issues. If you are experiencing flickering, try increasing change sensitivity and smoothing time.
Brightness change sensitivity
The higher the percent, the less sensitive service will be. At 100%, the app wouldn't react even if you put your device under the sun, at 10% a pretty significant sample change will need to be read from sensors and at 0% the service will react to the tiniest change in sensor readings.Smoothing time
When changes are big, the sudden transition may be unpleasant. This setting handles such situations and smooths the transition over the specified time. Note that the time is in milliseconds (1/1000th of a second).Technical explanation: The app will try to smooth the transition in at least 5 steps, but these steps will not take less than 75 ms and no more than 150 ms. A setting of 400 ms will thus make 5 updates in 80ms each while a 2000ms setting would do 13 updates in 150 ms intervals.
Smoothing time downwards
If you want your device to be responsive when brightening up and a bit slower when dimming (or the other way around), you will specify a different smooting time in this setting. This will be helpful when you are driving under street lights, for example. Specifying a relatively long smooting down time will keep the brightness levels appropriate to the lights being driven by.Smoothing override
This setting helps your device adapt faster to sudden light changes such as light turning on in the room or an unexpeded ray of sun in your shade. The setting uses the same scale as the brightness change sensitivity setting, which is the logarithmic lux scale divided into percent sections. Each percent represents one length percent on the graph horizontal axis. The setting translates its percentages directly to graph axis.Smoothing override setting analyzes each light sample to see if it exceeds override threshold. If it does, the new light reading will take effect immediately, as if there was no smoothing in effect.
Superdim threshold
Superdimming turns on an additional screen filter which dims the screen beyond what your display backlight would be capable of.The filter works in a linear fashion dimming the screen proportionaly from the threshold down to zero brightness as specified by the brightness curve. Actually it behaves exactly as the backlight control works (without the filter) only that it does not control the backlight, but dims the screen through a semi-transparent overlay. It is more accurate than the backlight and has the prefect minimum and maximum (the backlight may not respond in perfect grades down to zero brightness).
The end result is that enabling filter at threshold 100% (always active) simply introduces double filtering of screen brightness (once for backlight and once for filter) which produces a quadratic brightness function. Normally though you would enable the superdimming for the lower 15% - 25% of brightness to help achieve the desired low screen brightness.
Warning: This is a pretty strong function which could result in your screen being to dark to work with so the app has a built-in safeguard which prevents you from changing the threshold when such a change would produce screen brightness below 7%. If such a condition is detected, the superdimming functionality will not be activated.
Please note that standard LCD screens with backlight will not save additional battery. Take care to enable superdimming only at brightness level below which the brightness otherwise remains constant. Enabling superdimming at a higher brightness would produce unoptimal results because backlight would produce light only to be cancelled out by the filter.
On AMOLED displays the filter always produces battery savings.

Graph settings section
You will find settings for brightness curves and editing timeout here.Brightness preset
Presents some presets you can choose from to start you up with customising your auto brightness. Each preset provides a different brightness graph so be sure to test it out a little to see how it suits you.Graph abort timeout
Number of seconds of inactivity before app automatically cancels your manual update to graph.Launcher widget parameters
The launcher widget parameters allow you to change operation of the widget. This section only appears if you have Tasker / Launcher premium content purchased. Otherwise the settings are set to default values which you cannot change.Widget graph samples

Allowed values are between 10 and 2000 samples with a default of 400.
Widget graph time period
What's the period (in seconds) to display in the graph? The default is 86400 (one day), but if you're a fast-paced individual, you can decrease this time to monitor light changes in a shorter interval down to the last few seconds. Be aware though that decreasing this parameter too much can have an impact on battery usage because drawing graphs is quite a CPU intensive task.Widget graph stats percentage
Clicking the graph section of the widget will bring up a dialog with brightness statistics for the selected time period. Those statistics will be grouped by this percentage. Entering 20 (default) will create 5 groups, a 10 would create 10 groups and a 50 would only create 2 groups.Transparent widget
The widget will be rendered transparent or opaque on the launcher background.Changelog
Will open app changelog page.Auto brightness blog
Will bring you to app homepage.Manual graph editing
Dragging handles only supports smooth brightness curves with no sudden changes. If you want more advanced curves that use steeper angles, you will need to edit graph data through manual graph edit screen.The graph data is arranged into lines, each line representing one point on the graph. Each line starts with a fixed string "Pt:", followed by a single space, followed by integer sensor reading, another space and finally the brightness to apply at that sensor reading. Any other format than this will be rejected when you push that "OK" button.
Sensible sensor readings range from 0 to 15000. A point with a zero reading must be present at start of the list. A point with >= 15000 reading must be present at end of the list.
Allowed brightness values range from 1 to 255, 1 being darkest and 255 being the brightest screen.
If you want a steep "step" in your curve you will have to define two points with very close sensor readings and much different brightness settings (e.g. Pt: 100 20 Pt: 101 100).
In-app store
 The in-app store is where you can purchase premium content or just support the developer because you think this app is nice.
There are three items of note on this dialog:
Selection of item for purchase
At this time two items are available: Tasker support and Developer support. Buying Tasker support enables Tasker / Locale conditions and settings to allow for controlling this app from Tasker or Locale or any other compatible manager. In addition to this, the Launcher widget functionality will also be enabled when it is available.Buying developer support allows you to express your enthusiasm over this app to me. It helps fund various expenses I have with development of this app. It doesn't however bring YOU any immediate benefits.
Below these selections there's a short description of what purchasing each item does.
The Buy button
Pressing the buy button will enter the Android Play store where you will be able to securely purchase the selected item. The procedure is similar to any other purchase you make in the Play Store.Note that after purchasing one-time items such as Tasker support, the item will become grayed out - you cannot purchase it again since you already own it.
Purchased items list
Shows items you already purchased. Note that Developer support will not show here since it's not an "owned" item.Tasker plugin / Locale plugin functionality
Velis auto brightness will also function as a plugin for these two popular tools. With the exception of profile selection, this is considered premium functionality which you need to purchase from the in-app store.Conditions supported
Current light reading
Will report current light reading to Tasker / Locale. Note that this is a very frequent event so you may notice increased battery usage when this condition is active. Using this event enables you to react to environment changes as detected and calculated by the app. The sensor value reported will be the same as in the app itself, using all available and active sensors.Current proximity reading
Will report current proximity sensor to Tasker / Locale. Using this event enables you to react to changes in this sensor readings such as turning screen off when sensor triggers.Calculated screen brightness
This is similar to current light reading, but reports the brightness as calculated from detected lux and current brightness graph. This is also a very frequent event which may cause additional battery usage when active.Screen on
This condition reports screen on and off events. This condition is included despite it being in the Locale condition plugins sample - since the app uses this information anyway and this condition is not provided to Locale by default... Will allow you to monitor screen on / off states.Settings supported
The settings supported behave exactly the same as in the app itself so here's just a list of supported settings. If you need to understand how they work, please read the Settings section above.- Automatic brightness
- Brightness sensor
- Proximity sensor
- Change sensitivity
- Smoothing time
- Select profile (free)
FAQ
For some reason the screen goes very bright when manually installing / uninstalling an APK
This is caused by VAB disabling itself because by default Android APK installer is in the excluded apps list. This is necessary because APK installer refuses to work if there's an overlay window active.In order to not experience this issue (if you're not using the Super dimming feature) is to remove the APK installer from excluded apps list (available in the settings screen) - but then you won't be able to manually install apps or give apps permissions.
I have (insert your phone model) and the brightness changes are extremely noticeable / skipping / not smooth / flickering a lot
Some devices can only adjust display brightness in rather large steps. Examples include flagships like SGS 3, Nexus 4 and Galaxy note 2, but other phones / tablets are also reported to be affected.There is a solution for this issue, but it only makes sense on the AMOLED displays (most of the phones with such issues have those displays):
As of v3.05.122 the app supports only managing screen brightness through its super dimming feature. If you set super dimming to 100%, it will become the only method of adjusting screen brightness and will not try to adjust brightness through backlight (which is non-existent on AMOLED displays).
However, there's a caveat: super dimming has a completely linear brightness function very unlike the backlight method. As a result, screen will be much darker in the lower brightness sections. Using a brighter preset such as "AMOLED bright" is recommended.
My phone alternates light readings in rapid succession (hunting) making the screen change brightness all the time. How can I fix this?
Some phones have pretty bad light sensors. Even flagships such as SGS3 can be affected. To solve this problem, enable "Erratic sensor readings fix" or / and set the "smoothing time downwards" setting to a large value, like 10000 or 15000 milliseconds (10 or 15 secs). Te latter will not solve the problem as such, but will almost entirely eliminate the symptoms.Why is my camera not detected?
Camera detection sometimes fails for various reasons. Currently the solution for that is to open developer options dialog (see below on how to do that), turn off camera support, close the dialog, open it again, enable camera support and close it again. Cameras should be detected now. If not, try again, until successful.Since Android 4.3 I there's this notification. What is it?
The Android developers decided to solve the problem of lackluster API by exposing hacks people have to do in order to achieve certain functionality. In this case, the auto brightness service needs to run uninterrupted in order to provide proper support for the user. Without the service there is no auto brightness. The only way to make Android not kill the service at its leisure is declaring a notification.Hence the notification in the notification area.
Since version 3.15.141, there is an interactive notification option which is quite powerful.
Since version 3.55.151 there is an option to fully eliminate the notification. This latter is still in testing though. It can only be activated through developer options dialog by setting the service keep-alive interval. It is recommended that you not use superdimming and that you turn on optional system brightness updating in settings. If you can meet these conditions, the keep-alive interval can be relatively long, say 5000ms (to make sure auto-brightness is updated at least every 5 seconds). If these conditions cannot be met, the interval must be short, such as 500 ms in order to re-run the service as soon as possible after it being closed..
What's this developer options dialog that is mentioned all over the place?

All these settings are gathered in the developer options dialog which is accessible through long-pressing the proximity sensor reading on app main form (circled red in the picture).
Privacy policy
This privacy policy discloses the privacy practices for Velis Auto Brightness Android app (VAB).
Information Collection, Use, and Sharing
The app does NOT collect nor transmit any (personal) information.
We are the sole owners of the information that you provide voluntarily by e-mail or any other means used by us for communicating with you. We will NOT release this information to anyone
We will use your information to respond to you, regarding the reason you contacted us. We will not share your information with any third party outside of our organization, other than as necessary to fulfill your request, e.g. to help with in-app purchases or to implement a requested feature.
Unless you ask us not to, we may contact you via email in the future to tell you about specials, new products or services, or changes to this privacy policy.
Your Access to and Control Over Information
You may opt out of any future contacts from us at any time. You can do the following at any time by contacting us via any of the means available:- See what data we have about you, if any.
- Change/correct any data we have about you.
- Have us delete any data we have about you.
- Express any concern you have about our use of your data.
Security
We are using third party services to communicate with you, such as online forums, e-mail and similar. As such the information you give us is accessible according to their respective policies.Once your request is fulfilled, the information is discarded, but may remain accessible according to policies of the service you used to contact us, e.g. the forum post will remain visible in the thread, e-mail message will be archived, but not deleted, etc.
Updates
Our Privacy Policy may change from time to time and all updates will be posted on this page.If you feel that we are not abiding by this privacy policy, you should contact us immediately via email.